11 Nov 2015
- Mongodb provides a framework for aggregation similar to that of SQL database as below
    The following query finds the sum of all items by particular seller.

    db.collection.aggregate([ {
        "$group" : {
            "_id":{maker:"$"merchent"},
            {"$numofItems":{"$sum":1}}
        }
    }
    ])
As you can see above the aggregation framework takes a array as input to function.Aggregation framework in mongodb can be used like a pipeline with a set of commands that can be passed as pipes (similar to pipes in unix). The following are aggregation pipeline elements supported in mongodb
        projection  - $project
        match       - $match
        group       - $group    - performs aggregation
        sort        - $sort
        skip        - $skip
        limit       - $limit
        unwind      - $unwind   - unwinds array into unique elements
        redact      - $redact   - permission of documents viewing
        geonear     - $geonear  -  for geoloaction
- The following commands can be used with $group commands
        $sum    - performs sum or counting
        $avg    - Average
        $min    - Minimum value
        $max    - maximum value
        $push   - push a value to array
        $addtoset   - add a value to set if not already present
The below 2 commands must be used with sort to make any sense
        $first - returns the first element
        $last  - returns the last element
3.An example of aggregate pipeline with a project, sort and match sections.
        db.zips.aggregate([
            {$project : {city:{$substr:["$city",0,1]}}},
            {$sort : {city : 1}},
            {$match: {city: {$not: {$type: 2}}}},
        ]);
- The aggregation pipeline is better alternative to most of map reduce framework supported in mongodb.
06 Nov 2015
The following are the notes on mongodb Lecture 4
-
Pluggable storage engines introduced into mongodb from 3.x version.
-
2 storage engines supported - MMAPV1 and WiredTiger
-
MMAPV1 is the default , uses mmap command , os handles all the pages and other stuff .
-
WhiteTiger - newer one better handling of pages and perform better for most workloads.
-
Index as in any database can be used in mongodb to improve performance of query.Of course there is overhead in space and write operation as there is a index that needs to be updated every time.
db.collection.createIndex({scores:1}, {unique:true}) // creates index in ascending order
a. unique is optional and is used to guarantee the uniqueness and throw an error when we try to insert something wrong.

b. Sparse index can be used to Index for items that may not exits in all documents.However sparse index will not be used in sort query.

c. Indexing can be done in foreground and background.The default <b>createIndex</b> indexes on foreground.During foreground all read and write requests are blocked for the database. Background Index is at background and is slower. One way to do is to use the background creation in secondary .
6.Possible to create index on sub elements using the dot(.) notation as below
db.collection.createIndex({scores.score:1}) // creates index in ascending order
7.To list all the available index in a database we can use
db.collection.getIndexes()
8.Multikey index is an index on array. you cannot create multi key index on 2 or more arrays . Index are created as tuple in output.
db.collection.createIndex({scores:1, subject:1})
In the above example either scores or subject can be an array but not both.
9.Explain command can be used to analyze how a command was executed in a find command.
db.collection.explain().find({score.scores: {$gt: 90}})
In the output look for the “winning plan” as it contains all information about the query execution
One of the options of the explain command is the “executionStats” which provide more information regarding the execution time and so on.
Read all the stats from the bottom for easier understanding.
“All plan execution” option can be run to get details about how the query optimizer runs periodically to figure out which query plan to figure out which one is the best way to run the query.
-
Covered query is one that uses only the index to satisfy and need not go and look at the document. Make sure that the output is only the one the index you are using and if not it will become non covered query.
-
Index perform better when they are in memory and to measure the size of the index use the stats method of collection
    db.students.stats()
    {
        "ns" : "school.students",
        "count" : 200,
        "size" : 48000,
        "avgObjSize" : 240,
        "numExtents" : 3,
        "storageSize" : 172032,
        "lastExtentSize" : 131072,
        "paddingFactor" : 1,
        "userFlags" : 1,
        "capped" : false,
        "nindexes" : 1,
        "totalIndexSize" : 8176, <------Index size
        "indexSizes" : {
            "_id_" : 8176
        },
        "ok" : 1
    }
12.Mongodb automatically logs all queries longer than 100ms to stdout of the mongod logs.
One can enable profiling level using
db.setProfilingLevel(1,value).
0 - no Profiling, 1- Slower queries > value and 2 All queries.
a. db.getProfilingLevel to get the profiling level.
b. db.profile.find() will give the output of the profiling. Note its a constant buffer so it will overwrite older data.
13.mongotop and mongostat are used similar to top and stat for mongodb.
14 Oct 2015
Now that we have the application up and running in heroku its not time to hook up the backend i.e the database of mongodb to the blog.The following are the steps i performed to connect to the mongolab
-
create an account in mongolab site
-
Create a new database by clicking on the newdatabase button.
-
Select amazon as the provider and single node as we are testing free service as of now.
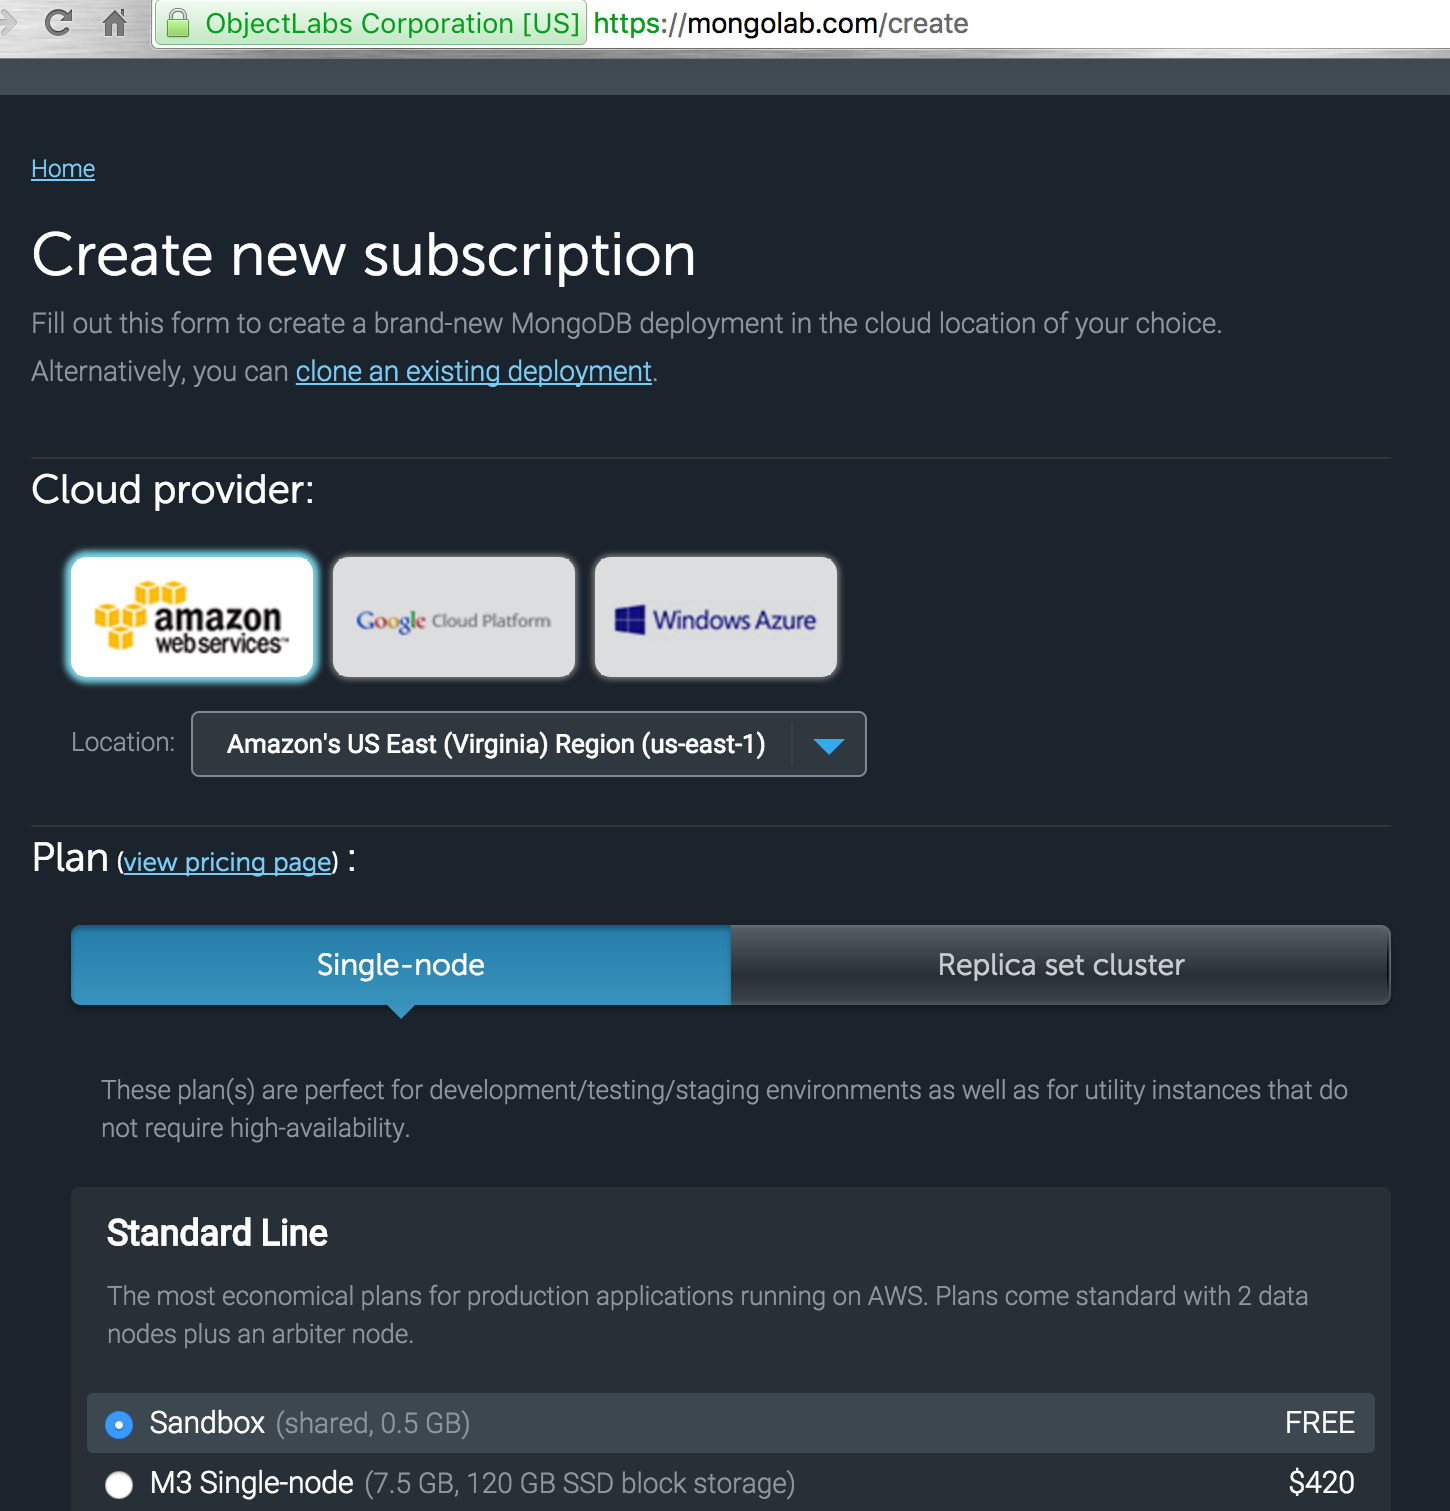
-
Use a unique name for the database.
-
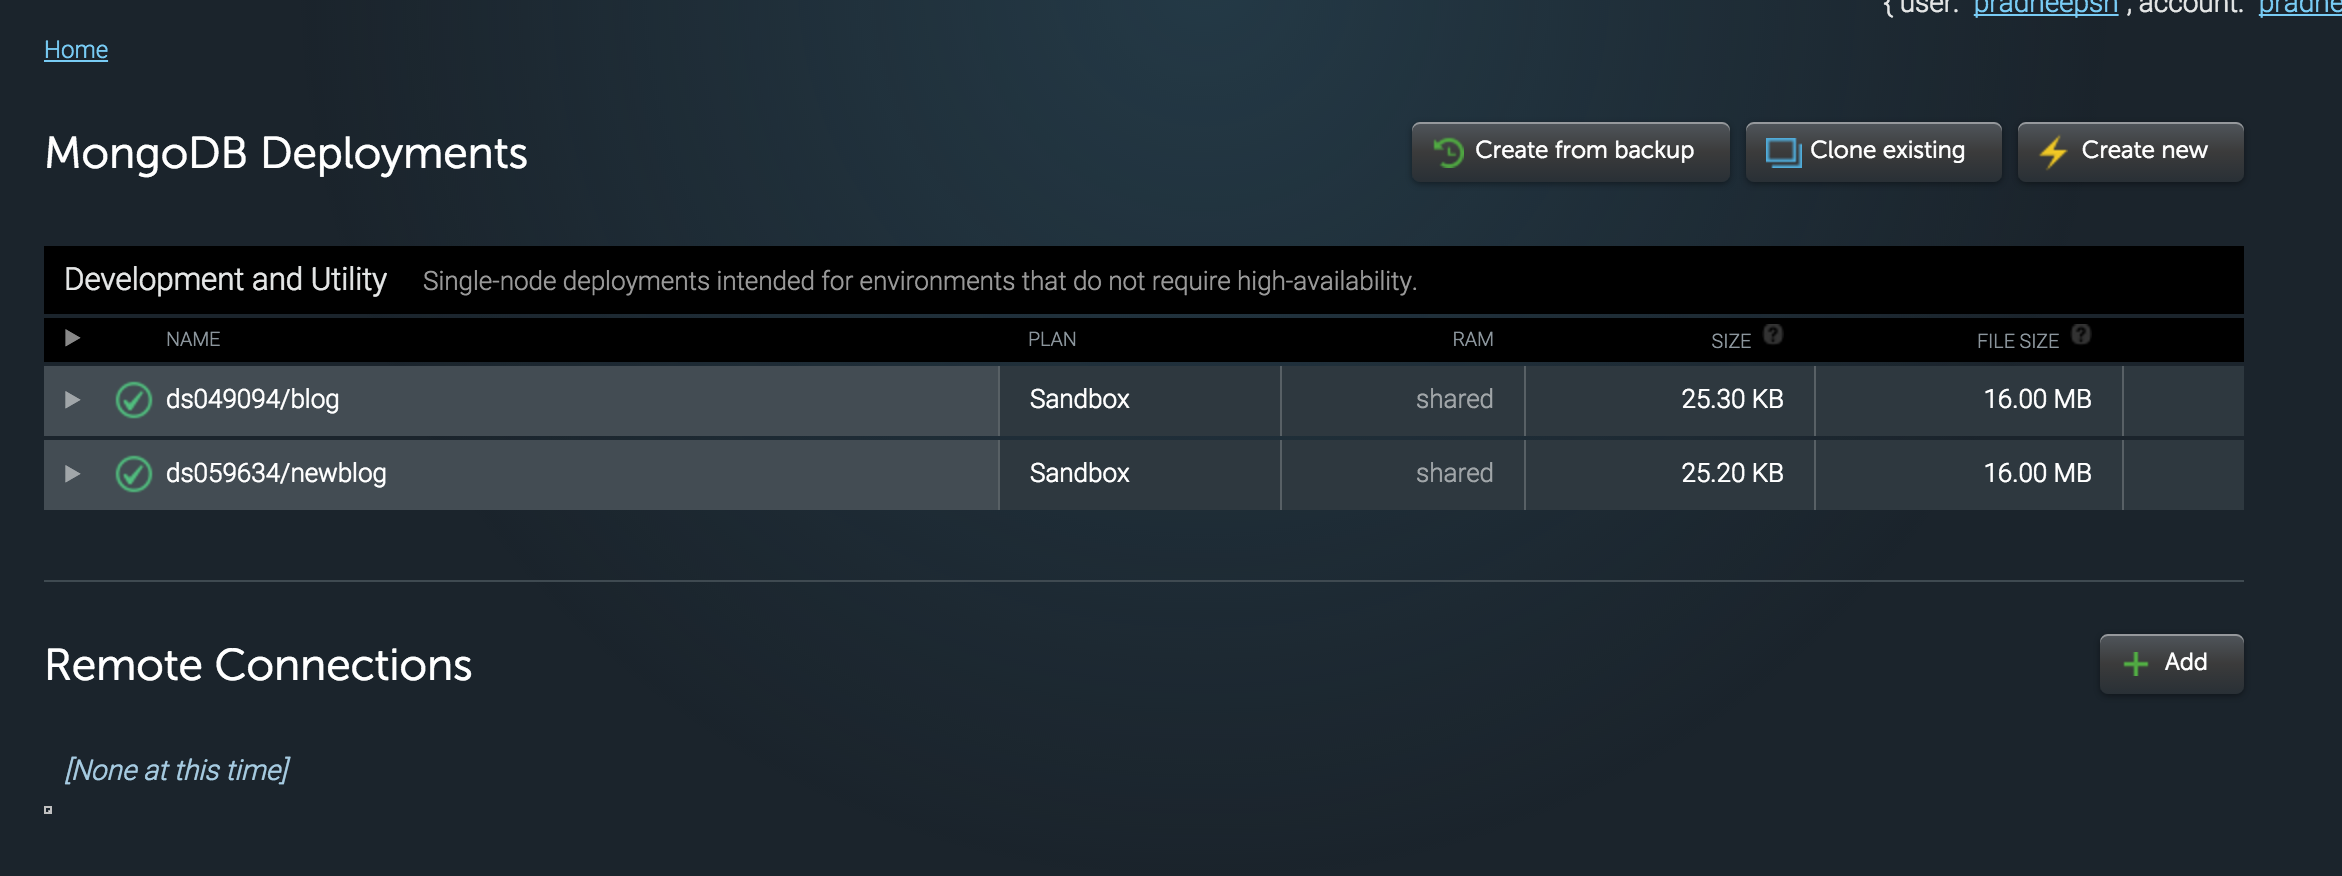
The database must now be displayed in the list of available database as below.Click on the database and enter the menu option
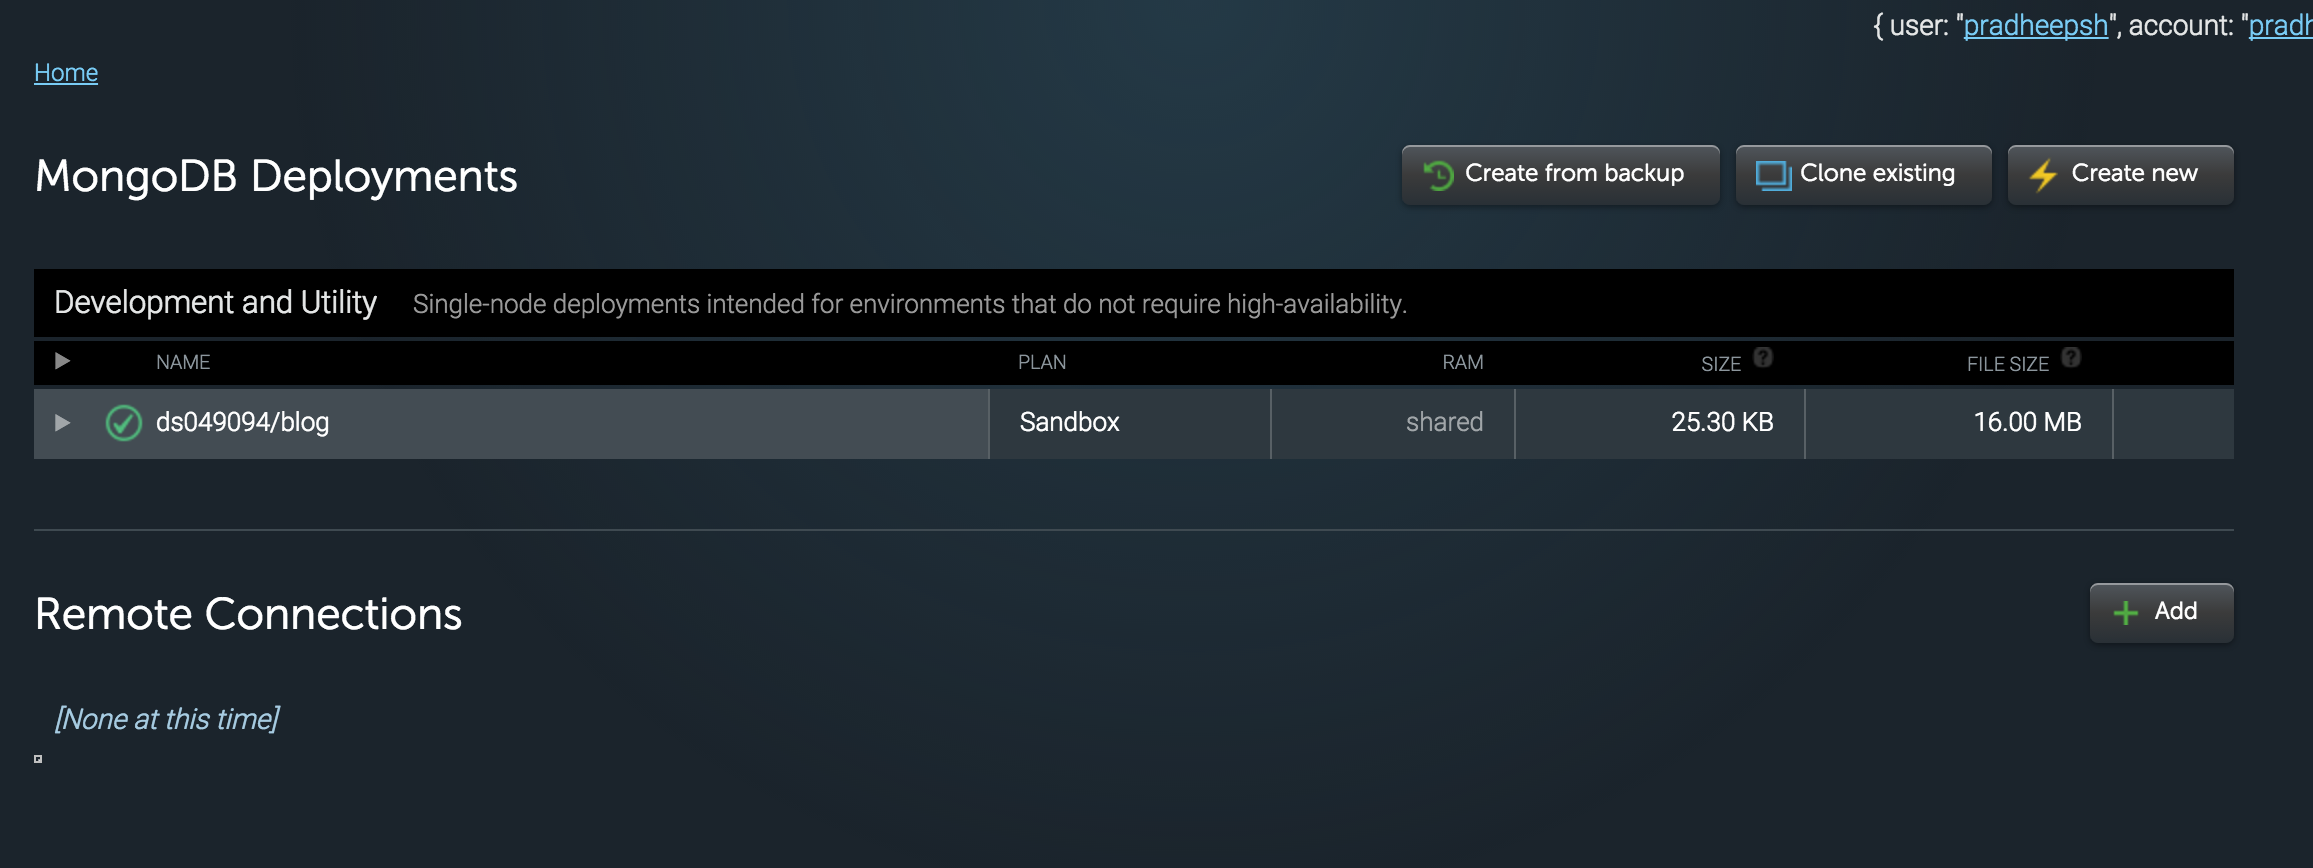
-
Create a new user name and password as this is this will be used to connect to database.
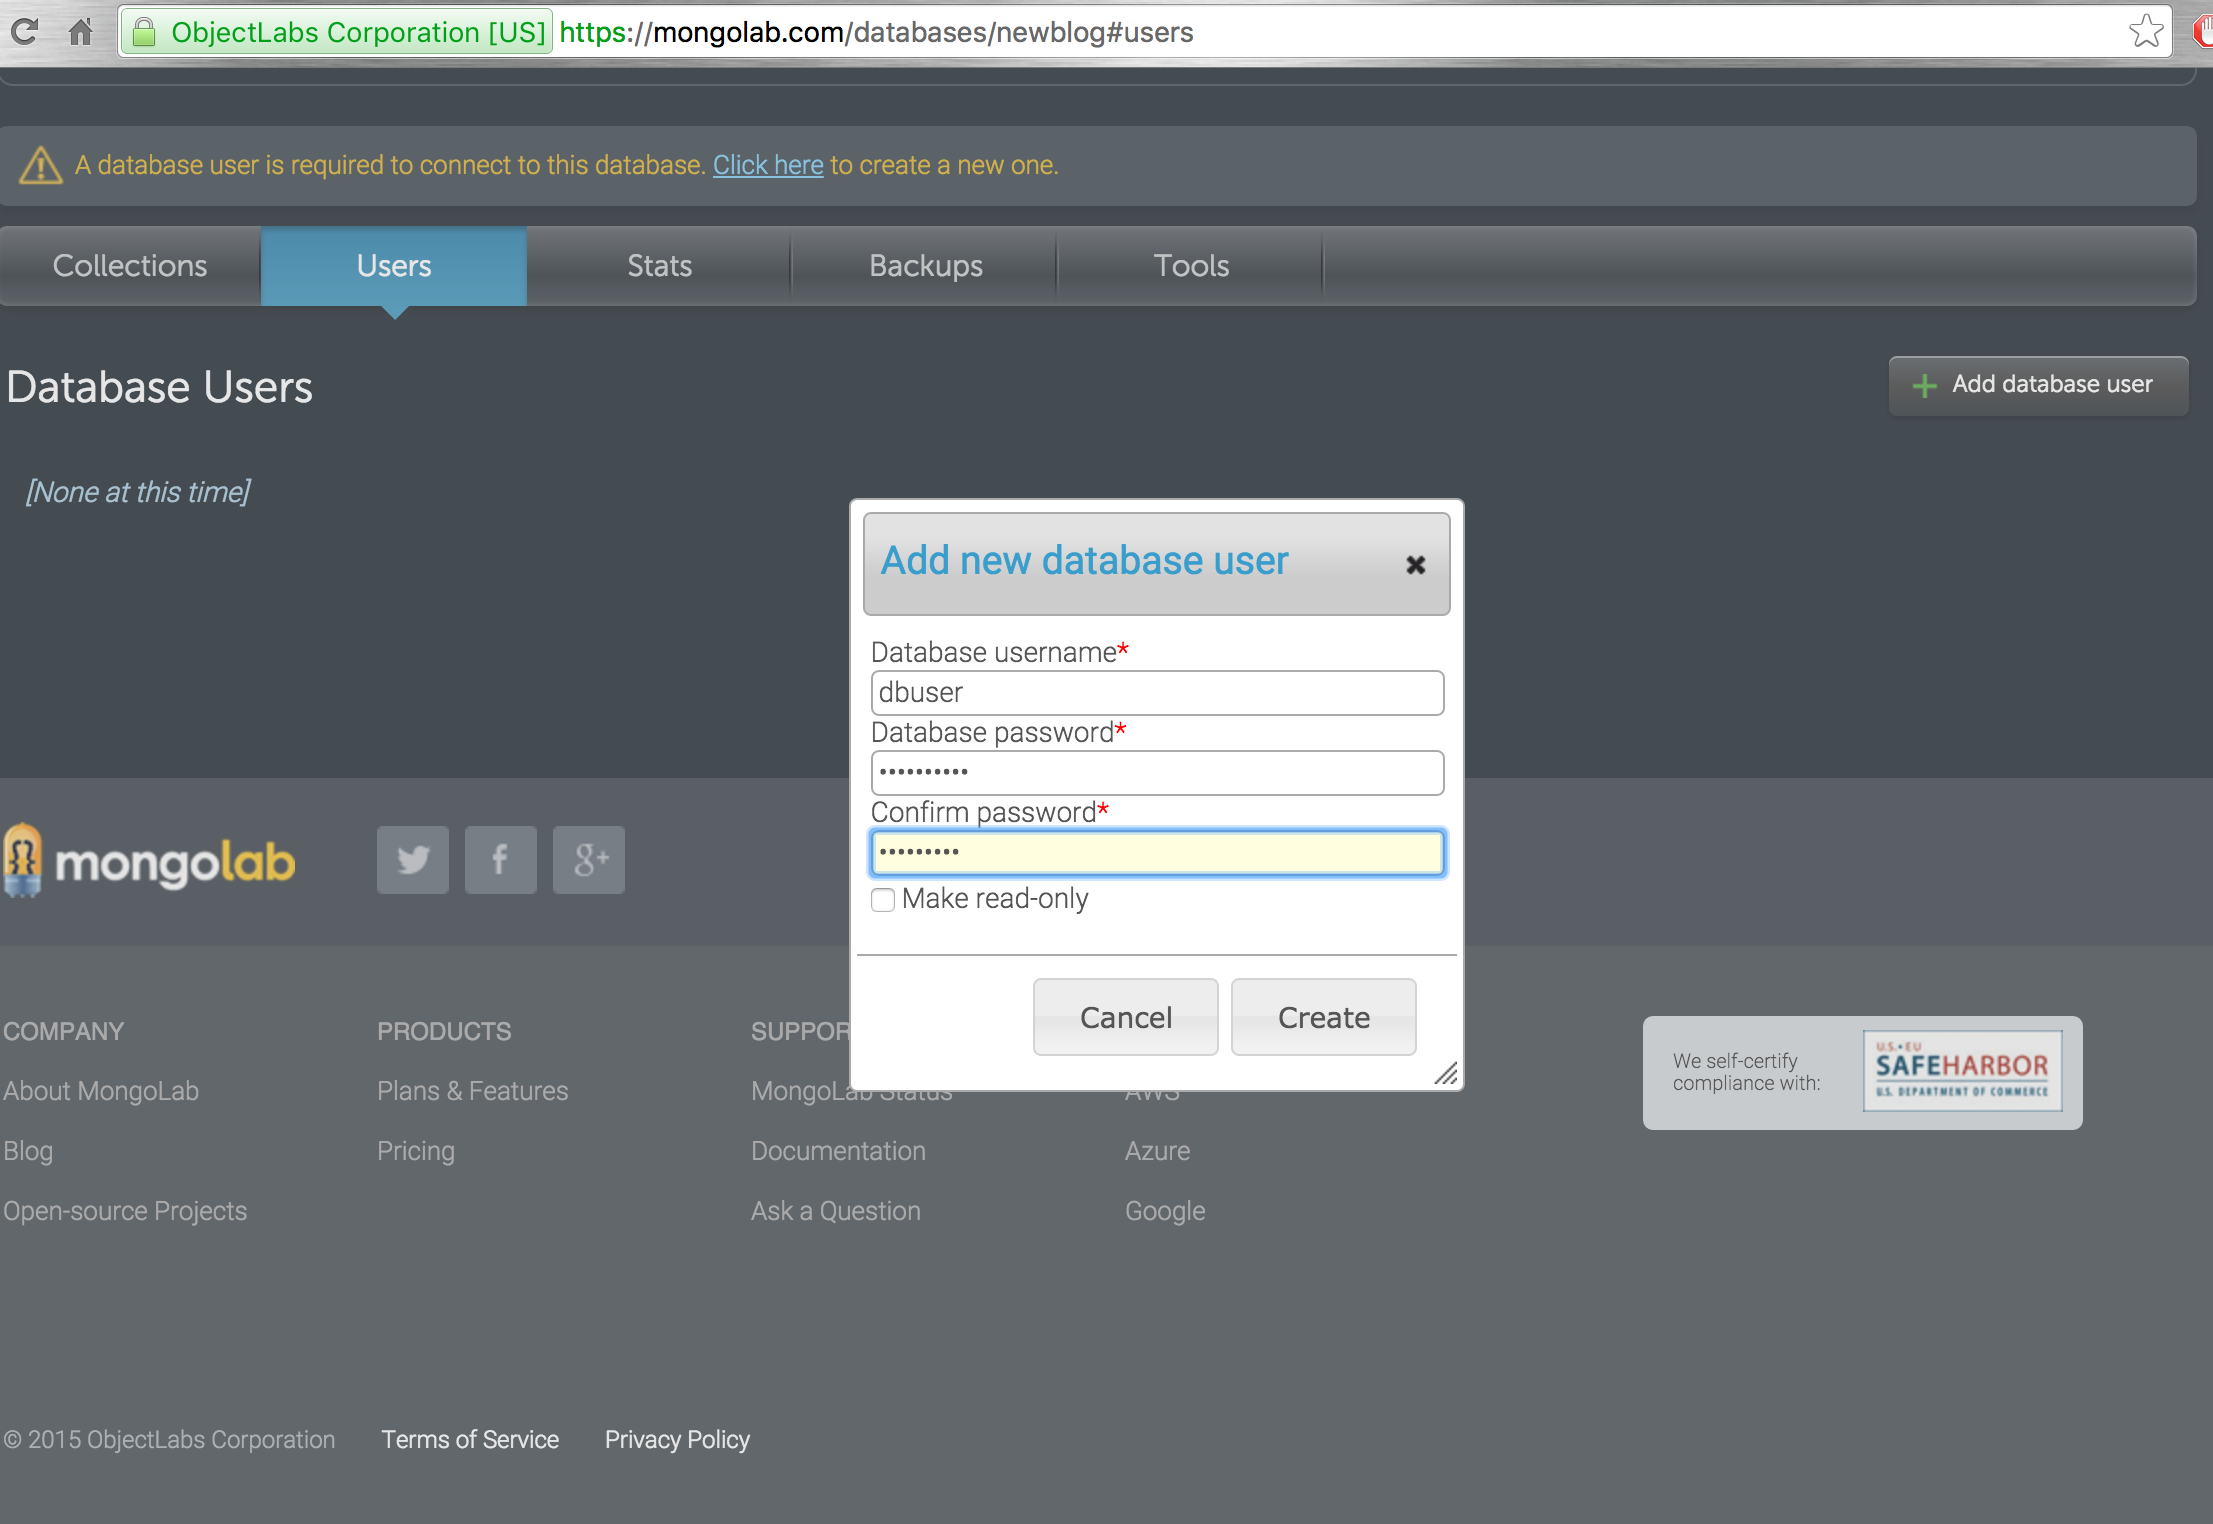
-
The usual way to connect to a mongodb server is as below in python using pymongo
connection_string = "mongodb://localhost"
connection = pymongo.MongoClient(connection_string)
database = connection.newblog
we change the connection string to include the name of the database which we got from step 5
connection_string = "mongodb://<dbuser>:<dbpassword>@ds059634.mongolab.com:59634/"
connection = pymongo.MongoClient(connection_string)
database = connection.newblog
8.Test locally with the actual value of dbuser and dbpassword locally and make sure that the application is working as expected.Now storing the password and login in code is a terrible idea, so we are going to use the heroku enviornment variable option to pass the login name and password.
9.Login to heroku, then go to your app->setting and then select revelConfig and add 2 enviornment variables like below to add your user login credentials.

- Change the code to get the user name and login also from enviornment variable something like below
db_user = os.environ['DBUSER']
db_password = os.environ['DBPASSWORD']
connection_string = "mongodb://"+ db_user + ":" + db_password +"@ds059634.mongolab.com:59634/newblog"
 connection = pymongo.MongoClient(connection_string)
database = connection.newblog
I have hosted the blog here and you can signup for your own account here and the entire code can be found here
P.S
Note the blog code is not mine and was provided as part of the mongodb course and i just used it as a blue print for hosting playing and running it on heroku and mongolab.